Saturday, June 27, 2020

Zinnias on Parade


What is a Saturday without a new video post from me?  I made a new video called Zinnias on Parade - these are pictures from classes I've taught all over the country and at big shows. I thought you might like to see students' progress in a one day, 6-hour class.  These beauties are in different stages of development and some of the fabrics used for these flowers were made from my hand-dyed fabrics (made in my garage) from back in the day.  Some are the student’s own fabrics, too, and they are all beautiful no matter what fabric they used.  One of my favorite zinnias in the video is the green one made by my friend, Pam Hough.  I hadn't met her until this class and when she walked in with these green fabrics, I squealed with joy.  I think I scared her at first but that's how I roll.

Now here is the reason for this blog. There are a lot of these zinnia flowers out there in the world and some of you have not finished yours.  Don't worry, I'm not going to name names. I would just like to help you finish them since we are still in lock-down.  OK, is it just me that’s still in lock-down?  You never know these days.  Anyways, lets finishes these zinnia quilts. 

Click the arrow to watch the video.

Now here is the surprise. I am making a new video class about how to make a 3 Zinnia Quilt out of one pattern in 3 different colorways.


 I will show you how to free-cut the leaves, what size fabric to use, and how to 
not get confused while making 3 flowers at once.  I have a few tricks for making these flowers quicker and easier than you think.  Plus, we will talk about quilting your flower.  So, check out the video here on this blog to get you excited.  If you subscribe to my YouTube channel you will get a notification each time I post a new how-to video.  Oh, and did I say this is free?


Saturday, June 20, 2020

Dogwood Finishing School - Class #5


Well, here's the last class in the Dogwood series.  I've has much fun teaching you this pattern and I hope you are having fun, too, making a beautiful Dogwood quilt.

It's hard to write a post and watch a very smart and active granddaughter but I am trying.
 Pool time!  It's 100 degrees and the air conditioning went out...

First,grandpa has to get her out of the sink...

...then grandpa gave her a cream cheese bagel in the living room.

I will be introducing new patterns and kits in the future but the Dogwood classes will have the most detailed instructions.  You can come back and refer to these as you work on other patterns. I will keep these available to you on YouTube and my blog. You may want to subscribe to my YouTube channel so you will not miss any upcoming classes or tips on future patterns.  I have a lot more to share in the future! 

Click on the arrow above to watch class #5.

This video is not as long as the first four but is very informative - it's 30 minutes and chock full of information.

Renegade Thread Play on the back of the Dogwood quilt.

My wish is for those of you that watched the classes to feel more confident in trying something outside your safety zone.  Remember, you can always fix a mistake or start over. It's only fabric.

So, if you are ready to take the next step, which is working from your own photo, come join me in Pacific Grove (on the beach in central California) next year for the Empty Spools Seminars, February 21-26, 2021.

At Empty Spools, I will walk you through the steps of making a pattern from your own photo, how to enlarge it, and create a palette of fabrics.  I show you how to pull out your creativity and create that next masterpiece.  This is a place where you can truly focus on your project  and I am there to hold your hand if you need it.  I've been teaching there since 2005 and it is so exciting for me to see students arrive somewhat timid with this process and leave with the confidence to succeed.


Thank you and I hope this series has increased your confidence in tackling that next project! 


Saturday, June 13, 2020

Dogwood class #4 “Renegade Thread Play “


I have been excited to make this video and show you how to finish your Dogwood quilt or any other patterns you may have started in one of my classes and longed to finish.  I have taught a lot of classes over the years and I know there are a lot of you wanting to finish your quilts. That is why I am doing these videos. I know some have criticized, "she is giving these away for free".  I have had a great career and taught all over the country and internationally. 

I've met a lot of wonderful people and they have bought my patterns and want to finish their flower quilts. Now is the perfect time to finish that quilt since we are stuck at home. So why not do a tutorial to help students finish their quilts.  It’s sad we can’t get together, take a class or go to a quilt show. But we can still learn and finish those UFO's.

The Dogwood videos has a lot of techniques that will be use in most, if not all my patterns. I can’t make you a pro over night, but I can push you a little and give you some tricks to make you successful. Just remember, this is just fabric, we can always get more. No one is critical of your efforts, but you.  So, stop it.  Life is too short.

Click on this box below to view Video

Supply I use for this Renegade Thread Play class.

Sulky 40-weight Rayon thread in an assortment of colors. Look at the fabric colors you use for your flower. The lightest values and the darkest values.

Sewers Aid-important

Thread snip- I like Karen Kay Buckley’s snip 

Lots of bobbins- if we use 15 threads you need 15 bobbins      

Quilters Dream Batting 100% cotton- Request        

Medium safety pins       

Top Stitch or Jeans Denim needles size, 80/12 or 90/14 - important     

 Supreme Slider

Some of these supplies you can find on my Esty Shop. The link is on the gray bar above.


Saturday, May 23, 2020

Dogwood Class #3 "Finishing Your Petals and Leaves"

Welcome back, the link to the third class in the Dogwood series is below.  There's a lot of information I need to cover in this video. I love my flower - I just got it done last Thursday and I cannot wait to get the thread play going.  This video, at 90 minutes, is longer than the first two.  I did not want to split it into shorter classes because so many of you are ready to get started. You can stop the video, work on your flower, then start it up again. 

I do want you to watch the whole video because there are some fixes and corrections I make along the way and I want you to know how to do them. Below is a link to a page that you can print out - it lists some of the oopsies I cover in the video - you may want to print it out before you begin or watch how I make the fixes, then print it out.  That is the fun part about taking a class - you get all the ins and outs plus tips and tricks. 


Above is where we are before this class - after this class you will have something like the pictures below.


This is the Dogwood up on  my studio wall.


For the seeds, I cut out at least 98 little circles. Relax, I'll show you a trick for cutting 4 at once.

The colors of the leaves just make the flowers pop.
 

I cant wait to get the Renegade Thread Play going.

This is a long holiday weekend and we are having  a pool party with our granddaughter and the forecast is for triple digits by Monday(!).  I will be posting the  Renegade Thread Play video in 2 weeks (from air-conditioned comfort), so stay tuned!

If you have questions, email me at melindabuladesigns@comcast.net


Saturday, May 16, 2020

Dogwood Class #2 Fusing, Layering and Backgrounds


I am SO glad you joined me for Dogwood Class #2. This video is going to cover a lot and is 45 minutes with resting spots along the way.  In this video, I will cover:   

  • How to fuse large pieces of fabric (like color A in this pattern)  
  • Which pieces to cut out first   
  • How the layout guide works     
  • Adding the lining pieces to color A     
  • How to use parchment paper sheets       
  • Working with the first layer
  • How to choose a background fabric


There is homework for next week, which is to fuse and cut out all your fabric pieces. I discovered a new way to organize all those cut pieces, which I like better than putting pieces in a little baggie. I saw the idea on the Fat Quarter Shop.  Designer Lori Holt made these little design boards covered in batting that hold your appliques while you are working on them.  I also found that they hold my cut fused pieces until I am ready to use them and I can stack them on top of each other so they take up less space while I'm working.

At the Fat Quarter Shop, they have a video on how to make these out of foam core board. I did not have foam core, but I did have lots of cardboard boxes.  


I cut my firm cardboard, my batting, and one piece of fabric all 12” x 12”.  Then I put Steam-A-Seam 2 on the back of the batting and the back of the fabric.  Next, I ironed them, peeled off the release paper, and put the sticky side of the batting on one side of the cardboard and the fabric on the other side and ironed them onto the cardboard.  I then made 2 ¼ inch binding and hot glued it around the edges of the exposed cardboard.  Or you can just buy one pre-made for $12 from the Fat Quarter Shop - they come is all sizes and colors.

I organized the boards by letter - 3 letters (colors) to a board. I put all my red hearts on one board and put that board on the top of the stack. This is going to help me find pieces when we do next week’s class.


Next week,  class #3, we will finish laying all the Dogwood flower pieces down and get it ready for Renegade Thread Play in week #4. 

I hope you are having fun doing this project.  If you have any questions, you can email me at melindabuladesigns@comcast.net or leave a comment below.

If you need supplies, kits, or patterns, you can find them at my Etsy shop - click on the link above this post on the gray bar.


Friday, May 8, 2020

Dogwood class #1 Learning the Pattern

I deleted the first Dogwood class. How and why dont even ask me. 

What can I say but HELP!

So here it video #1 to help get you ready for making the Dogwood quilt or any of my pattern i have.

I want you to feel confident and be successful and maybe learn some new tricks.


You can find supply and patterns on my Etsy shop plus I have fabric kit and fusible web. 

Sunday, December 22, 2019

First Christmas In The New House


It has been a different Christmas season here at the Bula home in Bakersfield. It’s a new house, new area and new weather. Warm and very nice. I did have to put on a sweater the other day it did drop to 40 overnights.   Problem with the new house is you must spend time figuring out where all the Christmas decorations will go in the new floor plan. It was quick and easy at the other homes.  OH, But I forgot, I have no decorations so you would think this will be easy. It’s not. 36 years of Christmas decorations (or as Joe calls it, "Christmas crap" all gone, all lost in the Camp Fire. Which I’m not really feeling that bad about losing.  Some of that Christmas “crap” needed to be burned.
I do look forward to the day when we hit a holiday or life’s milestone and not always be remind of what we lost in the fire. Looks like that may not happen for a few years. But we are so blessed.
It has been a different Christmas season here at the Bula home in Bakersfield. It’s a new house, new area and new weather. Warm and very nice. I did have to put on a sweater the other day it did drop to 40 overnights.   Problem with the new house is you must spend time figuring out where all the Christmas decorations will go in the new floor plan. It was quick and easy at the other homes.  OH, But I forgot, I have no decorations so you would think this will be easy. It’s not. 36 years of Christmas decorations (or as Joe calls it, "Christmas crap" all gone, all lost in the Camp Fire. Which I’m not really feeling that bad about losing.  Some of that Christmas “crap” needed to be burned.

I do look forward to the day when we hit a holiday or life’s milestone and not always be remind of what we lost in the fire. Looks like that may not happen for a few years. 
With the new house comes new stuff!  Which is what I’m focusing on. I wanted to share with you some of the new Christmas items I have found for our new life and house.
This neighborhood is very festive. More than 75% of the family have some sort of decor up on their homes. Some are very elegant, and few make you giggle. We have never been in such a Christmas-y neighborhood. I love it. I make Joe drive down every street to see the lights. He hates that. but doses it anyways. Everyone is in the spirit of the holiday. And of course, I want to keep up with Jones. but I don’t have any decorations and it will take some years of collecting to build back up our Christmas stash. Just like fabric. So, I did some research and found out you can rent lights and have them installed and taken down. WOW! How much can that be? Well its $1,200! I don’t think so.

So, I made some big red bows, there are YouTube videos show you how. The Magnolia Housewife was a great one. I bought some holly and lighted garlands (Amazon).  Some ornaments at Home Goods. love the Home Goods. I even have 2 cross stitch ornaments I made last year while driving 7 hours (one way) to visit Matthew and his family for the holidays. Now I can walk to his house. but I drive, its is 2 miles.


 I’ve also been looking to replace my Christmas china. Haven’t found anything that goes with my house which is blues and greens. But I follow a blogger Miss Mustard Seed and she posted about finding these vintage (1970) 12 Day of Christmas plate set on eBay. She too was having trouble with Christmas colors. I found them! Let the biding begin. So much fun. Then I needed a dinner plate or charger that would go with my new finds and I found a very classic Lenox pattern called Opal Innocence. I bought 8 dinner plates for now. I’m still looking for a silverware pattern. But the wine goblets on the table are the real find. Again eBay, I liked them because of their white snowy design and a gold rim that goes with the Lenox dinner plates. They are called, Arby's Winter Wineglasses. I did a little research on them and found out they were a giveaway gift in the 80's from Arby fast food restaurant. Buy a burger get a free glass. Too funny!  but they are perfect! 
So, when we are having that big dinner party (ha ha) and invited the president, please don't tell him the glasses are from Arby's!

But instead of mopping over what we lost. Which I can easily do. I’m focusing of the future and enjoying being able to make new memory. So, I made a video of the house to give you a peek of the Bula's simple Christmas time.


 Oh, and how can I forget the beautiful Nativity set I’m collecting by artist Patrice’sBrewster. Love collecting. Because this is the real reason why we are celebrating with family and friends, enjoy feasts of food and presents under the tree.  Its Christs our Savors birth. Merry Christmas! 


Wednesday, December 18, 2019

The Joy of Piecing a Quilt!

I am having so much fun making quilts. Traditional quilts not art quilts. I been working hard and have taken some time off in Dec and Jan to just play in fabrics. Most of you know we lost everything in the Camp Fire that wiped out the town of Paradise California. Which mean for the last year I have had to replace a lot of personal possessions. One thing we are dearly missing is cuddle quilts. Which to me are the quilts you throw over the sofa and are there when you want to cuddle watching TV. And they should always go with the decor of your house. I was raised by an interiors decorator and that’s how we roll. Plus I now have a grandchild and you need quilts to cuddle your grandees in.


This first quilt I wanted to make was a kit I bought a month after the fire. My idea was to hand piece this. i lost all my sewing machines and I thought it would keep my mind busy while we where transitioning through all the fire trauma. I have to keep my hands busy or I’ll go crazy.
The kit was a pre-cut from #LaundryBasketQuilts. What a beauty. The quilt is called Alaska.  

I have not pieced a traditional quilt in at least  5 or more years and I was a little rusty. I spent a lot of time with my new favorite sewing tool “ the seam ripper”.  At one point I wondered how many time can you remove stitch from the same fabric and it still holds up. 4 if you want to know. I soon came to realization that I need to find my perfect scant 1/4”. Scant being the important part. My BERNINA 765 arrived and I adjusted my 1/4” and all was well with the world and my piecing. Just like riding a bike.


When Margot came over she really liked the quilt so I’m now making her a cuddle quilt. That will be in the next post. This has been so much fun.  Now to decide if I will quilt these myself or send it out?


Friday, December 13, 2019

Upcoming Retreat Feb 23-28 2020 Pacific Grove


Have you ever wanted to learn how I do this kind of art quilting? Or should I say painting? Actually, there is no paint used on any of my quilts to create these flowers - it's just luscious fabrics like batiks, hand-dyes and mono-colored prints . I have an independent study class February 23-28, 2020 at Empty Spools Seminars. February is a great time to visit the beautiful beaches in central California, so fly right into nearby Monterey and get out of the cold.


This quilt started out with a photo for inspiration. I took this photo in my backyard in El Dorado Hills, CA 4 years ago. I did a drawing, then a tracing and then the most important part, selecting my fabrics. I hand-dyed a lot fabrics for this Camellia. Batiks work great, too. Avoid solid fabrics - they don't work because they are too flat. Your fabrics can have little prints on them as that gives some great texture. The key, as always, is to have more fabrics than you think you will need.

Don't forget about the values in your fabrics. You will need the lightest lights to the darkest darks. Watch me select and arrange my fabric palette in this video.


At this retreat you may want to work on your Thread Painting. 
My quilting technique is called Renegade Thread Play because I had to invent a new way to quilt my flower quilts. I've been doing this a long time and back in the 90's it was pretty wild, if you can believe that. Traditional quilting did not work so I had to be a Renegade
The threads soften the bold fabric shapes and adds details like veins in the petals and leaves. It can also add more shading or accentuate the highlights on the edges of a petal.
It's another tool for adding more color and value to finish off your beautiful flower quilt.

 This is called Fresh As A Daisy. I am also showing you the back of the quilt and my thread painting.

And yes, I wind a lot of bobbins.

 I'll show you how to curve your threads as you quilt to give your flower that 3-dimensional look.  I'll also share a secret for how to sew through thick fusible web. 

 Let's say you want to relax, play with fabric, and enjoy the great venue without all the thinking that goes with creating from your own picture. Well, I have another option for you. I have many beautiful patterns you can choose from that will guide you through the complete process of creating a beautiful flower.  If this appeals to you, go to my site, melindabula.com and decide which pattern you want to do.  Let me know your choice and I will email you the supply list for the flower you want to make and you're ready to select fabrics for your visit to the beach. If you want, I can make up a fabric kit for the flower you select.

 I hope you will  join me this Feb 23-28 at Empty Spools Seminars . any question email me at, melbula@comcast.net

Wednesday, August 21, 2019

Tips and Tricks Video


Video is at the bottom. So you will read the post!  
Let’s get educated. Iv spent the last month working on making some “how to”or Tips and Tricks videos on how I do my technique for making my Art. Or as some of you may call it Quilt Art or Art Quilting! Call whatever you want but I’m creating and making stuff so I call it, Art and I use my sewing machine so that quilting so we have Quilt Art!


I get asked a lot of question about how I do what I do, why I use Steam-A-Seam 2 and how to handle the sticky that comes with this product. I thought I’d answer those question by doing a few videos. They will also be posted here on my blog so you can come back anytime and watch your favorites.  They will also be on YouTube under Melinda Bula if I do all this tech-y stuff this right! 

Let’s talk about fusible webs first. There are many fusible webs on the market today. The last time I counted it was close to 20 and growing. Here what you need to Know! They are not the SAME and are used for different fusing and quilting techniques!   When your pattern or the instructor says to bring a certain kind of fusible web! Bring that fusible! That pattern and the instructors technique is based on that fusible web they are asking for. This is so important! all of us so called fusers are not doing the same thing! its like we are called Quilters but under our sewing machine we are all doing different quilting techniques. Right! Same with fusing.

 You can’t use just one fusible web for all these techniques.  Just like the threads we use today, you have to buy the right thread for the technique you are doing. We now have many choices and that may not be all good. Are you confused yet? 

In this blog and my first 2 videos  I’m just going to talk about the one I use. Steam-A- Seam 2. I have tried most of them. But come back to SAS2 for my technique. I’m always up for something new! They are all good products. But Fusing is not the same for every creative person out there. We are doing many different and unique techniques with fusible web. 
And don't get mad at your quilt shop owner. They can't afford to carry all 20 fusible webs under the cutting tables. That is why  bring yards with me to classes when I teach. 
Every time you see a color change its another piece of fabric.
 
Ok, what’s my technique? I am laying or overlapping layers of fused fabric on top of each other just like you lay paint on top of other paint. That’s how I make my art quilt. Iv layered up to 6 layers and still been able to sew through it.  The threads i add when quilting are another layer of color added to the composition. Steam-A-Seam 2 allow me to do that. And of course I have developed some tips and tricks I want to share with you.
And I don’t use the Lite Steam-A-Seam (Tip)  It’s dose not stay adhered. When I’m trying to quilt my piece it lifts up off the fabric.   when peeling it off the release paper half of it stay on one paper and the other half is on the other release paper. Which makes my students panic and have a bad experience!
First #1 video is about how to put the fusible web on the fabric! There are tricks that make it easy to use.
Video #2 is how to deal with all the sticky and how to clean it off all your sewing tools. That means your scissors also. Did you know there are special scissors that work better with sticky fusible web?

Hope these videos will answer some of questions? You can leave questions below or on YouTube and I will try and answer them. Remember the video is just talking about my technique and using Steam-A-Seam 2.
NOTE: no company is asking me or paying me to do this. I just have a lot of experience with this fusible and watching 1,000's of students a year using it. I figure last year I bought about 2,000 yards the sticky stuff for myself and student. 


Saturday, April 13, 2019

And it began. The rebirth of my creative space, the studio! This is the room I value the most beside the kitchen. Not so much because I love to cook; I do, but I really like to eat more! 
The studio is my other right arm, a part of my body and extension of myself, I thought, and then it was all was destroyed, burnt to the ground, melted in the fire. It made me stop, take a deep breath and reflect on who I am as an artist. Everything is gone - what does that mean?  What would it mean for you?

If you’re like me, you can't stop making things or creating even when I have no paints, fabric, or tools of the trade. Then I realized that creativity has nothing to do with what is on your studio walls or in your drawers but what is in your head and heart.  It’s not stuff!  I feel a new freshness arising that can go any direction I want. I'm not tied to the past but still have all the sweet lessons I learned from each piece I created. So maybe this is more of a blessing than a loss - can a new direction be the ultimate creative gift?

So, I am looking forward to the future but first I need some tools to start my new journey. The first thing I needed and did not have was a pencil! Just a simple yellow # 2 pencil. l wanted to draw but all we had were pens from Holiday Inn Express. That just didn't do it for me. Another thing the fire does to you is make you value little things that you never valued before. Like the pencil. I have neglected how important this item is in my world.  As the young man expressed to me at the store counter, "Do people really still use pencils?"  I guess I'm not the only one who has taken the lowly pencil for granted. Happy to say I now have 10 pencils, very sharp and ready to go at a moment’s notice. I'm so happy.

I thought I would share the rebuilding of my studio and this crazy next phase of my creative life. You can survive without all that stuff but the pencil is still a much-needed tool.


And always get good insurance!
Studio Tour: This room is big enough to have my computer and sewing stuff all in the same room. Probably because I have no stash to store. We will see how this works in the future.


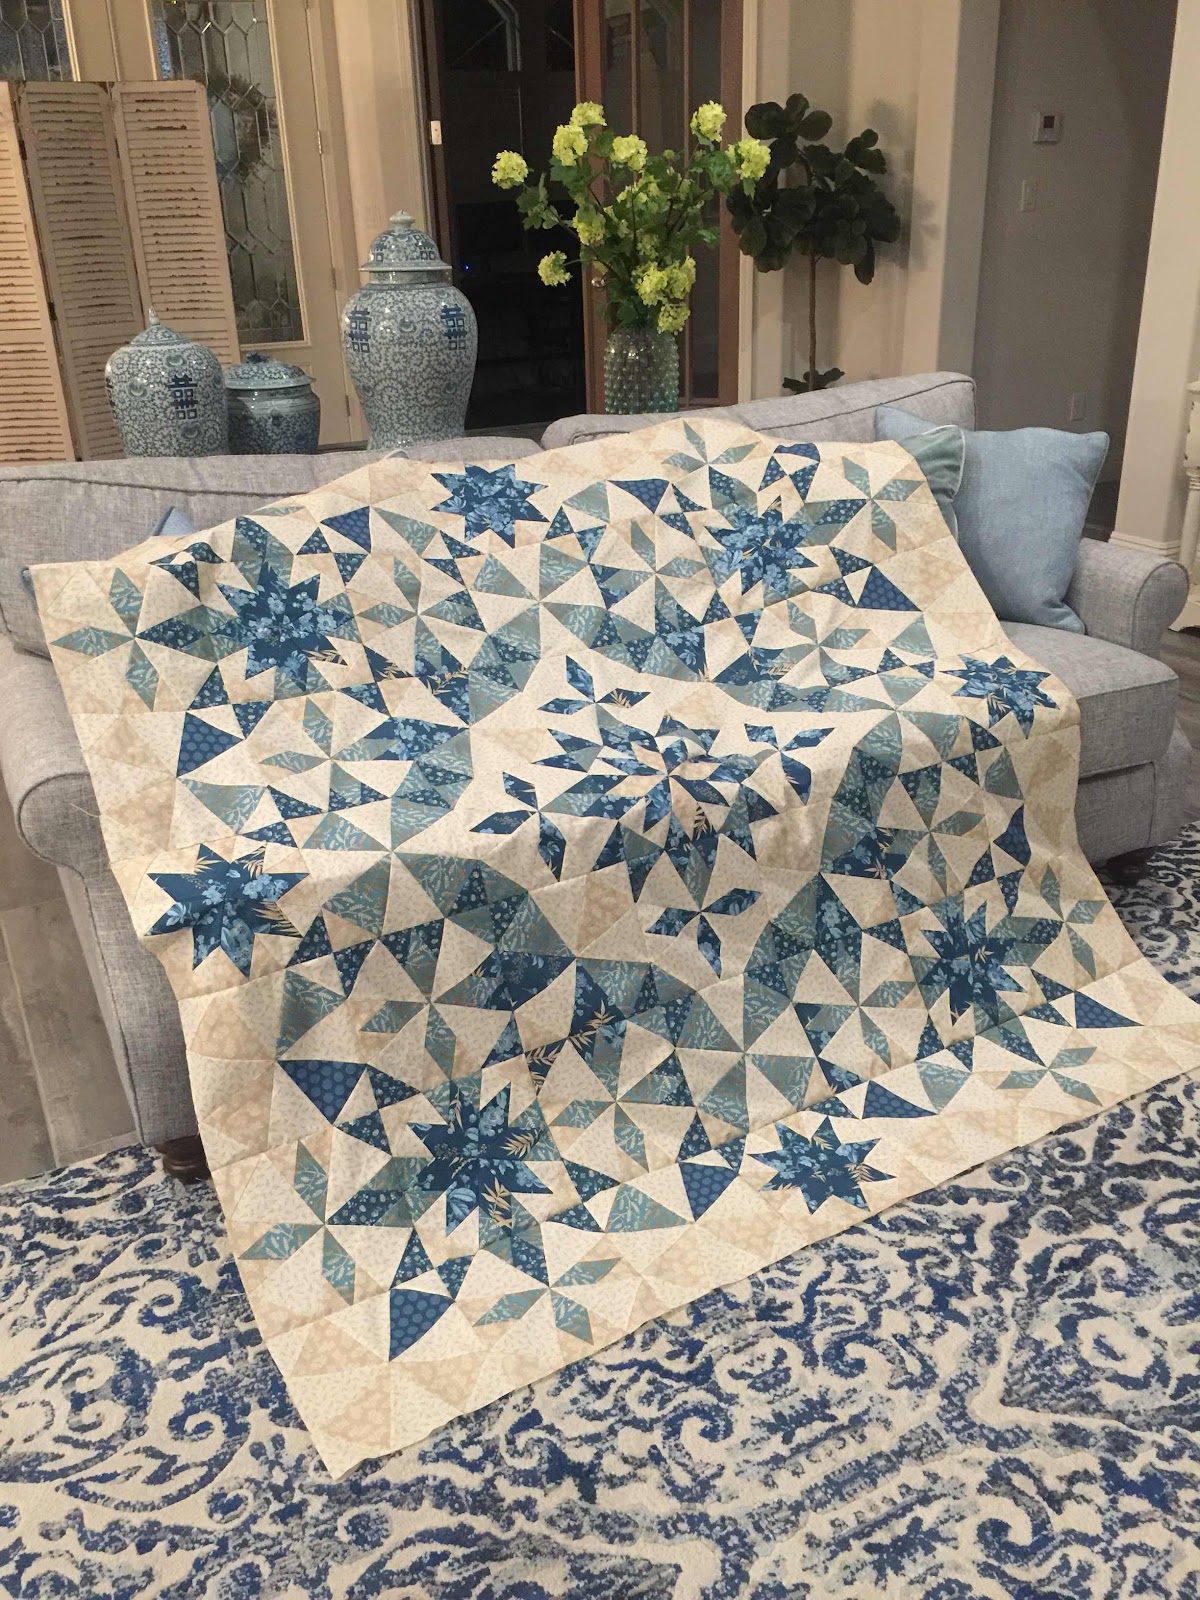
Right behind the computer table are my 2 IKEA tables that can be raised to 36" high if need be. The tall book shelves are also from IKEA. This side of the table is where I have been doing my cross stitches.
"Long and Winding Road" by Black Bird Designs. 


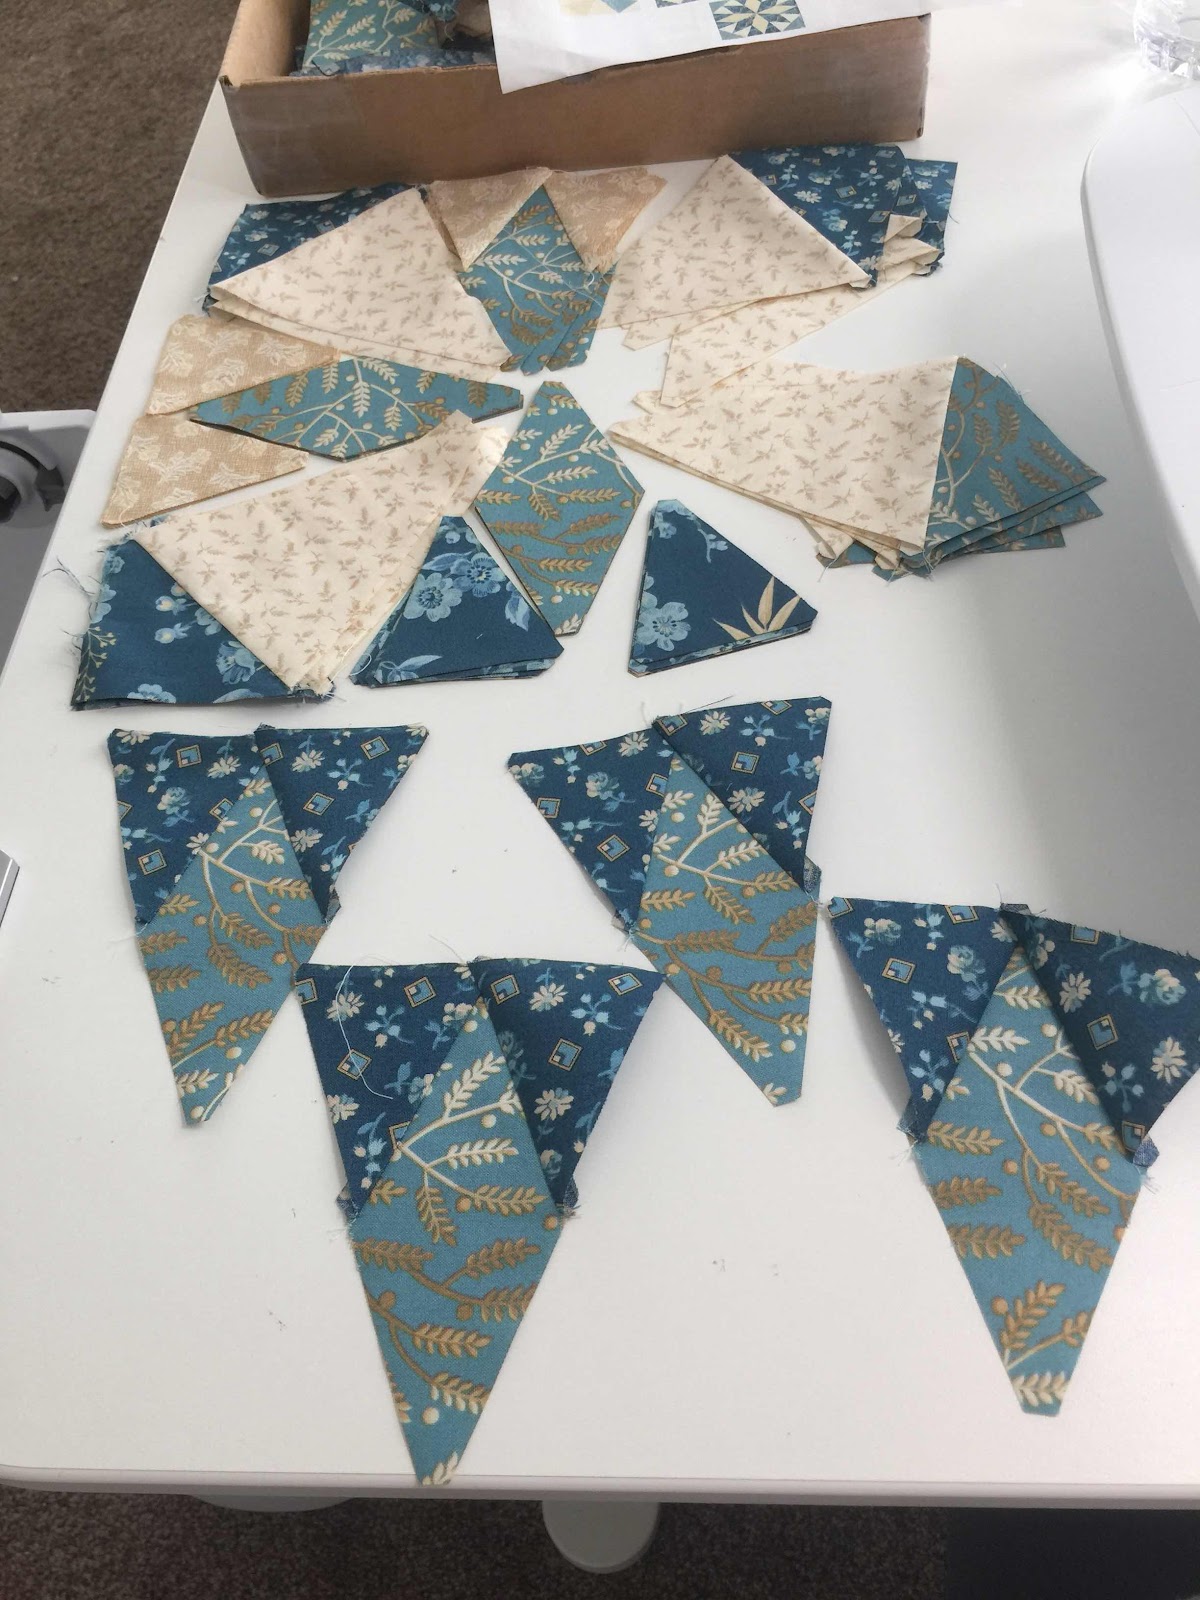
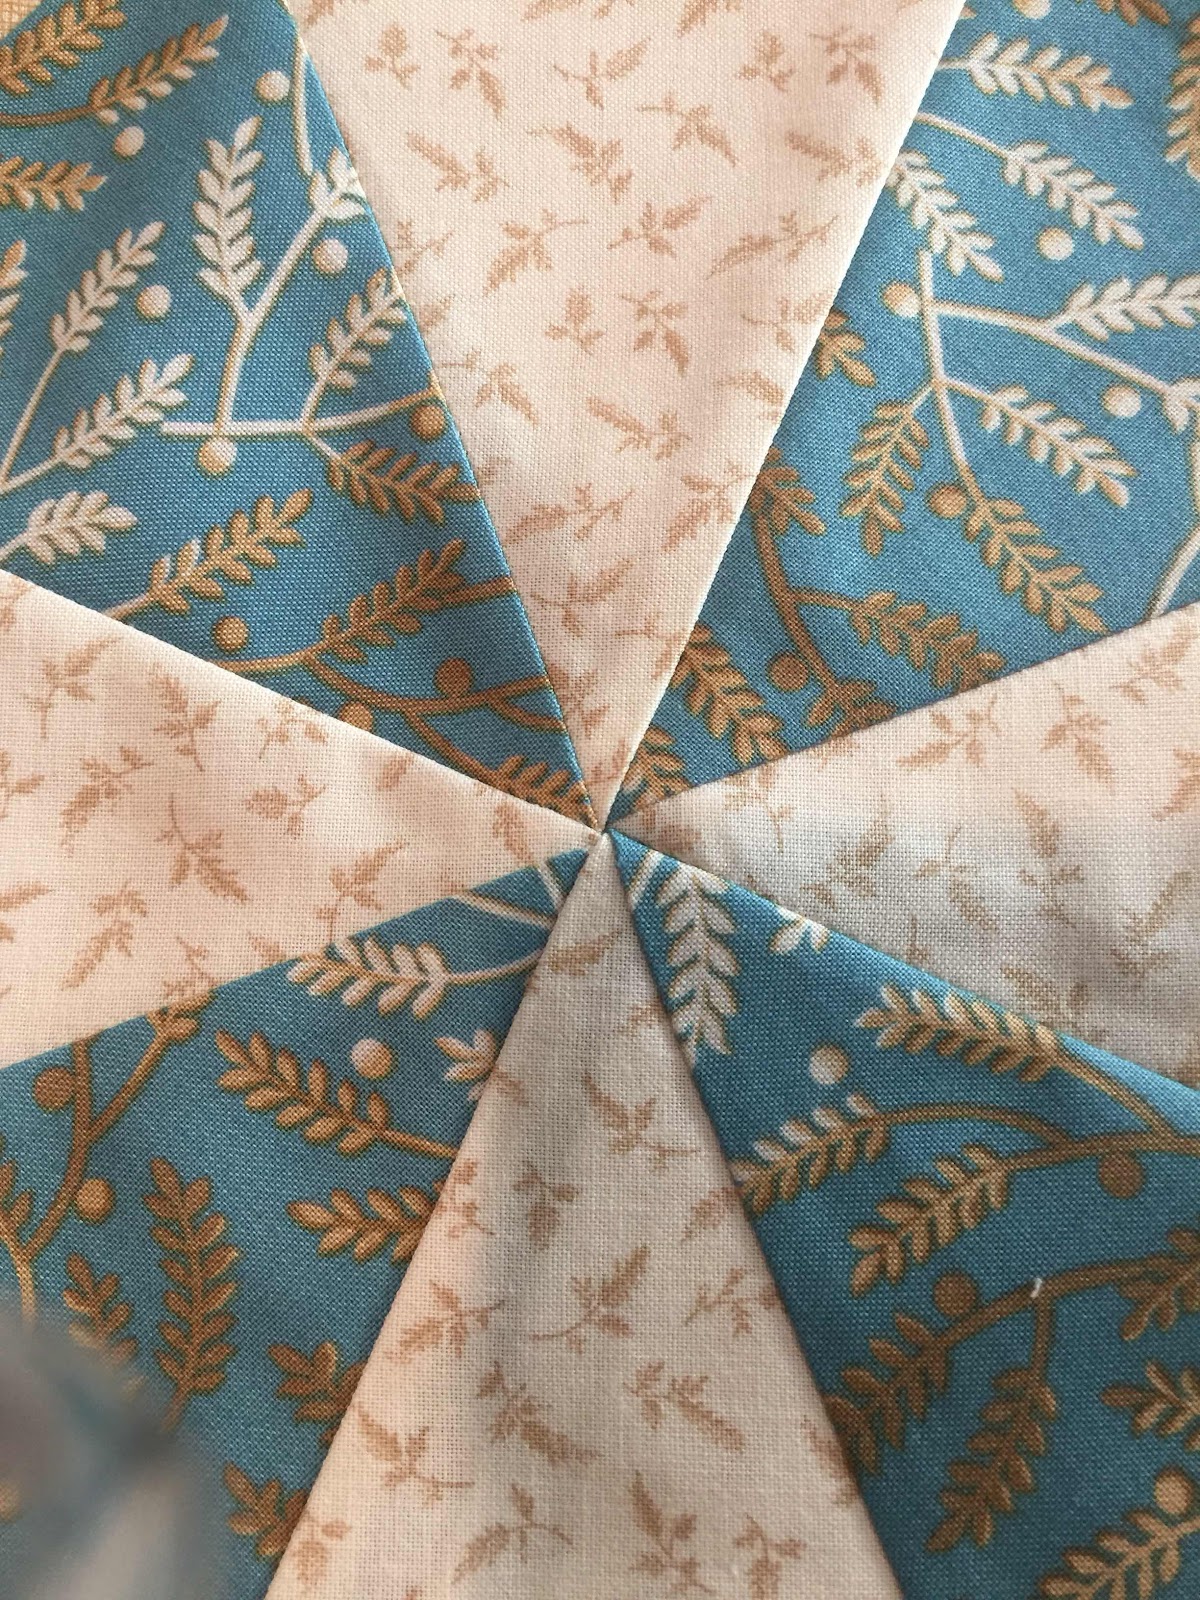
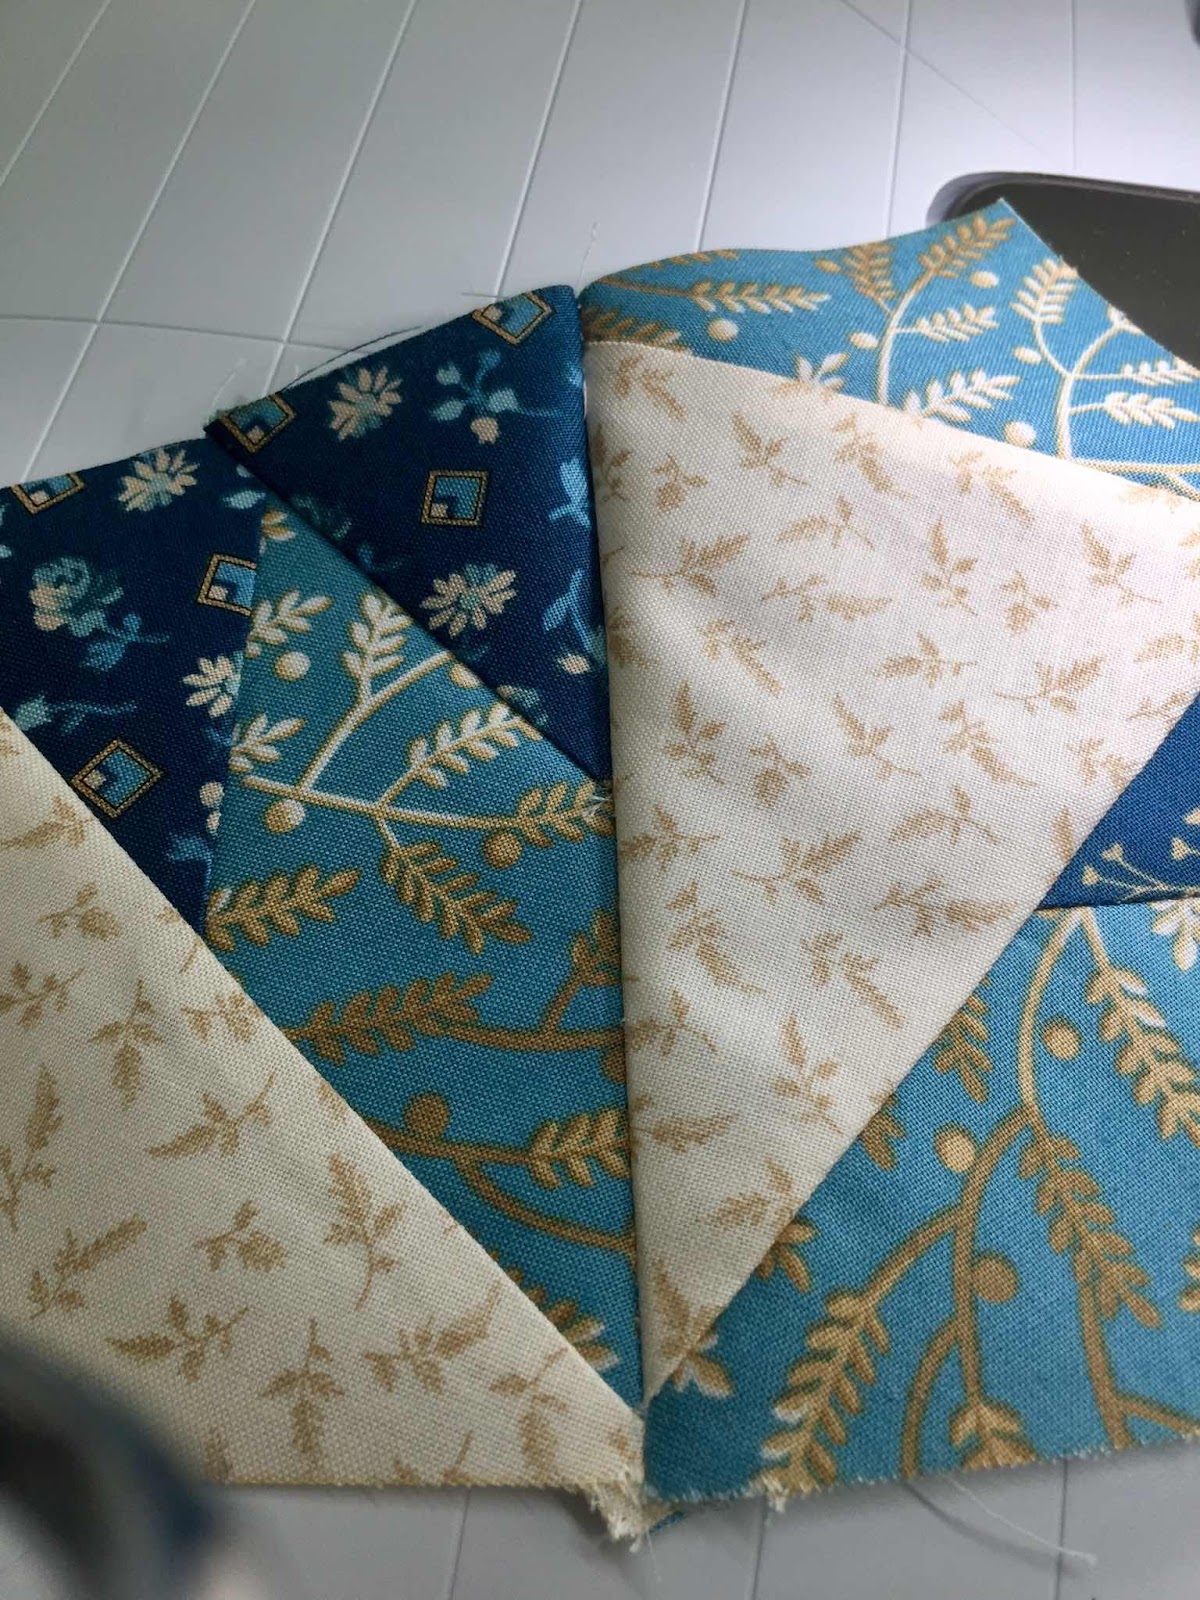
I just got a shipment of Hoffman of California batiks to make fabric kits for my classes, the web site and retreat. My new BERNINA 770 QE is on order! Can’t wait but in the meantime, I ordered a JUKI straight stitch machine off Amazon!  I also lost my previous JUKI in the fire. I had 8 sewing machines which included a Brother embroidery machine, Brother serger, 2 older BERNINAs and a BERNINA 750 QE.  Not to mention the Kenmore my sister and I used to make most of our clothes in high school. I kept all the machines together, when not in use, in my studio closet.  When we were finally able to see our melted property, I started digging around looking for anything left. I found 3 BERNINA knee lifts all in a pile and in pretty good condition. But no sewing machines.

My new large cutting table. It can also be raised and lowered. Got on Amazon. 2 sets of IKEA dressers that will hold future fabrics. The wall with the dog quilt will soon be a design wall.


I now have 2 rulers and a rotary cutter thanks to the great goodie bags teaches get when teaching at IQF.  
My first fabric where gifts from Paula Nadelstern and Kimberly Einmo. Thanks, girls!

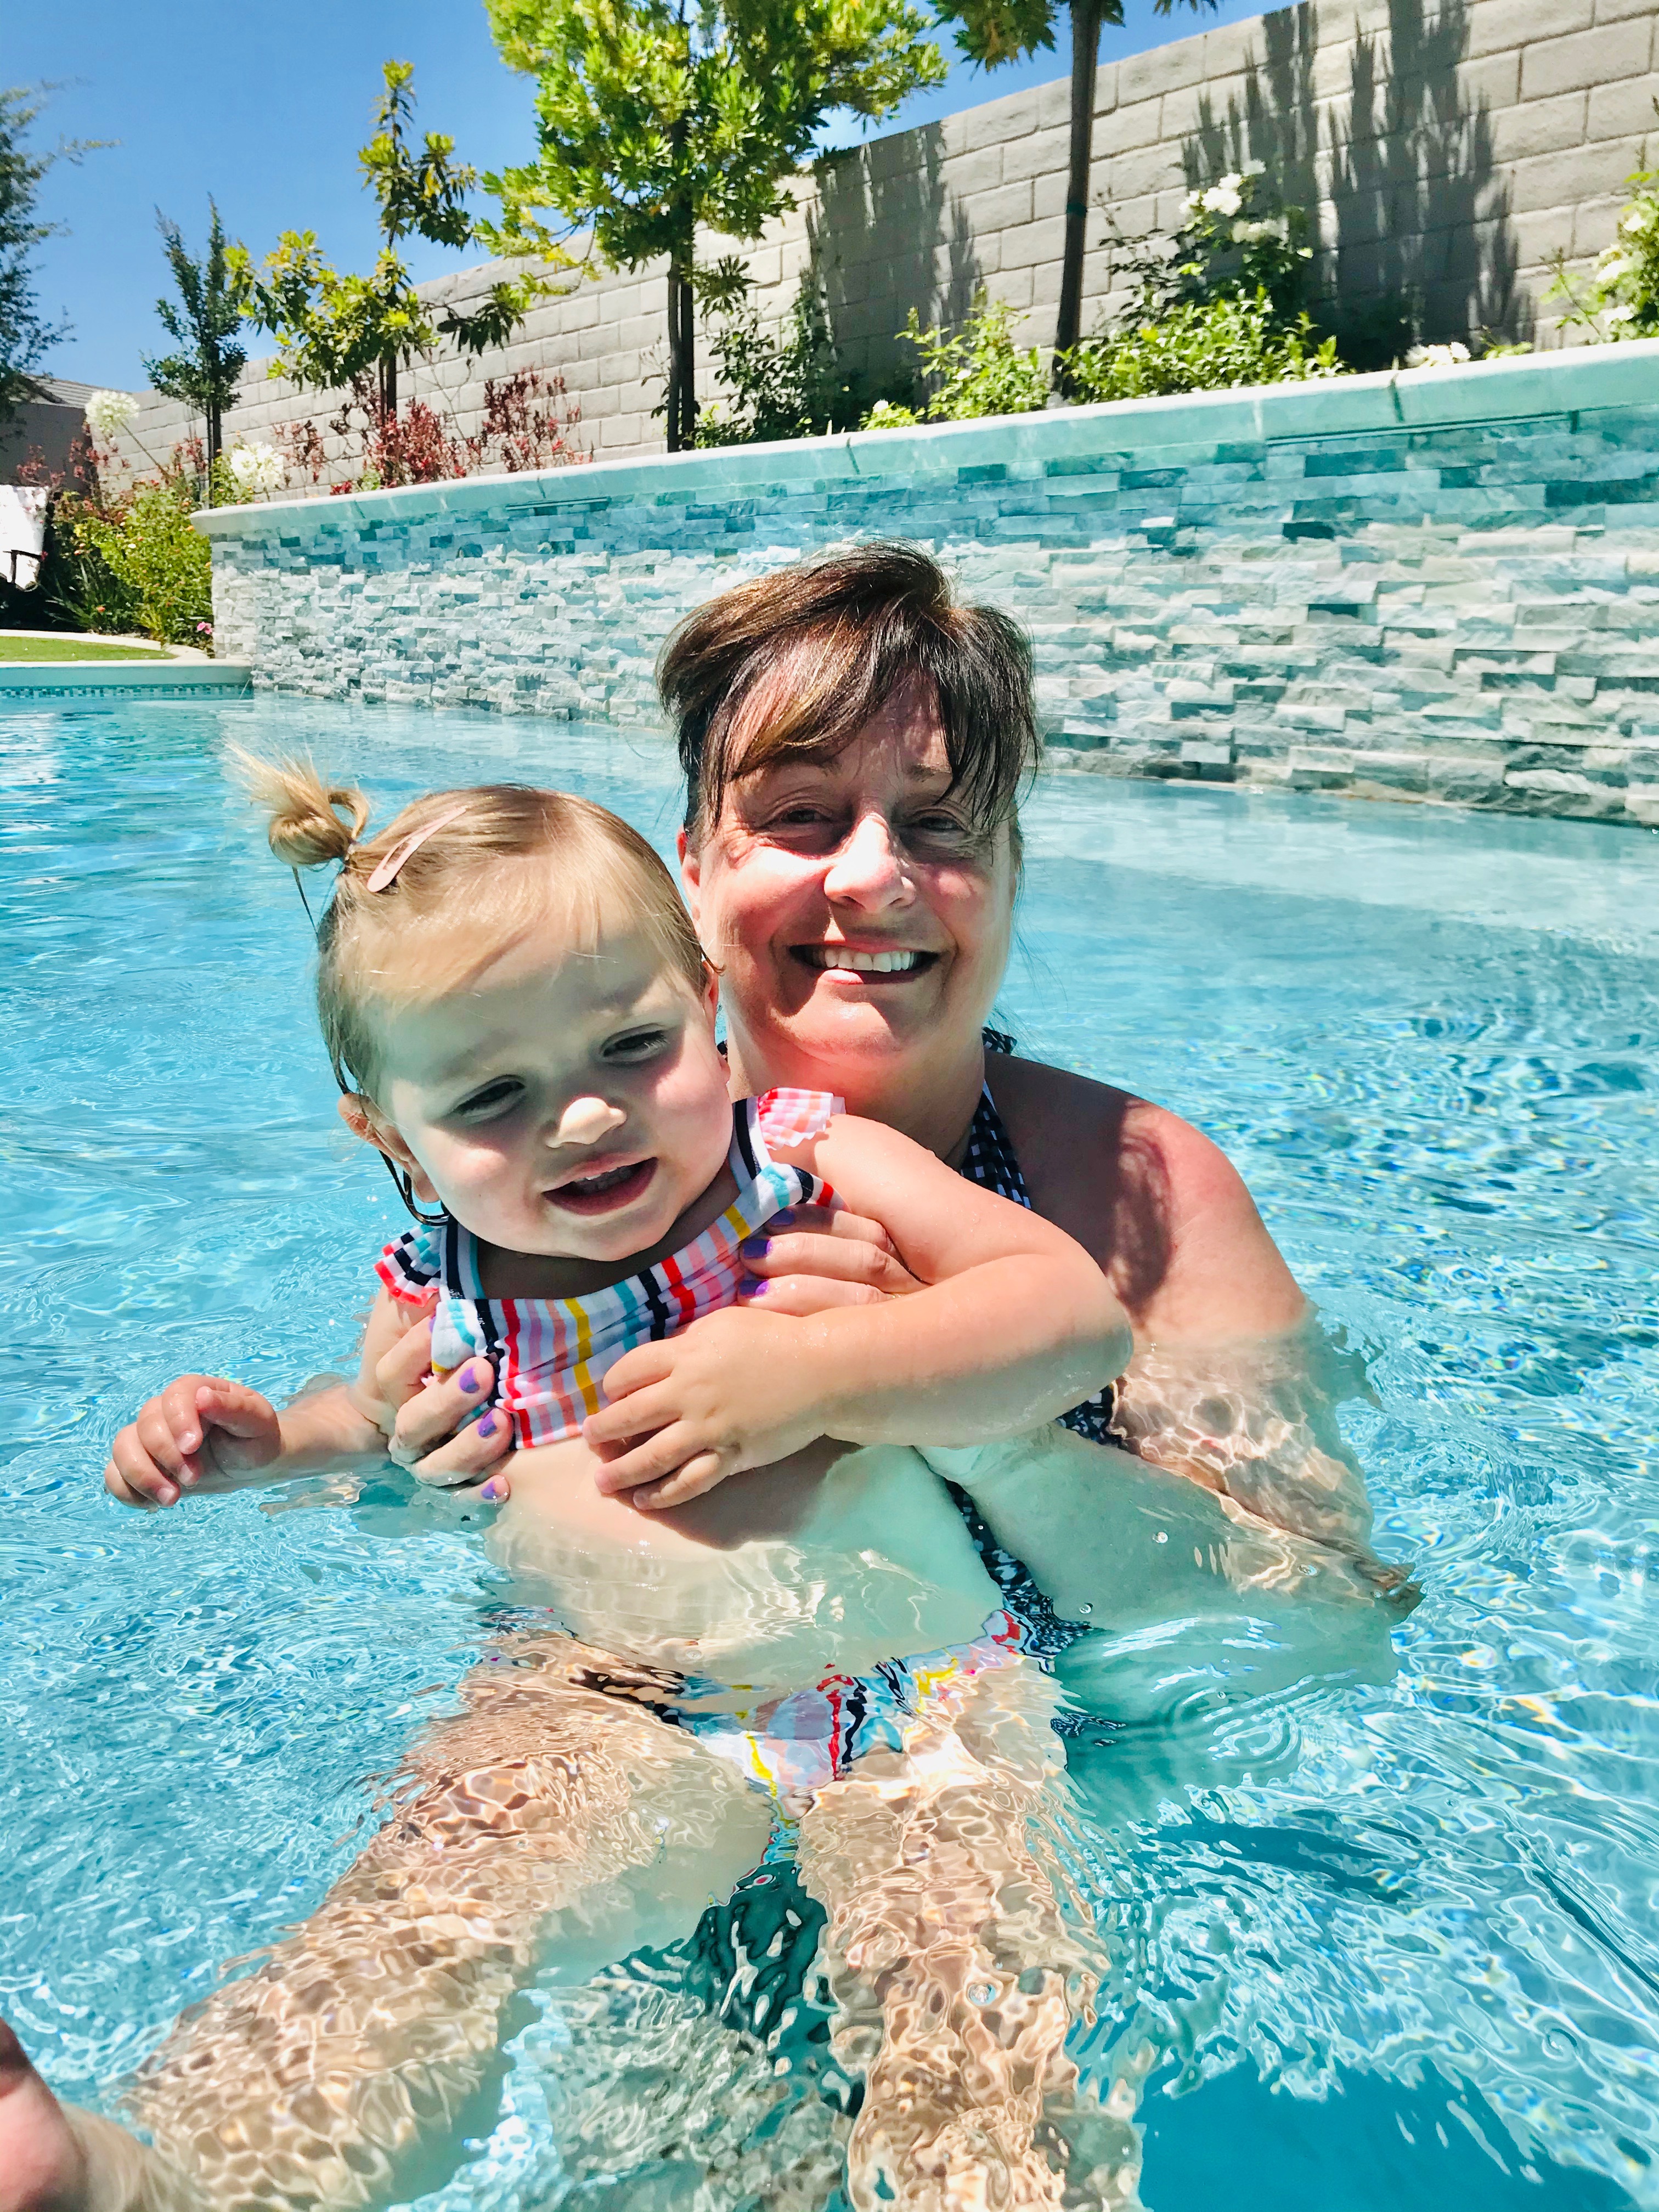
And, to top it all off, the view!  It may not be the mountains with trees but will be a beautiful swimming pool. I look forward to the future.